
Quick Start
SpringNote's core functionality consists of three parts: recording, organizing, and reviewing.
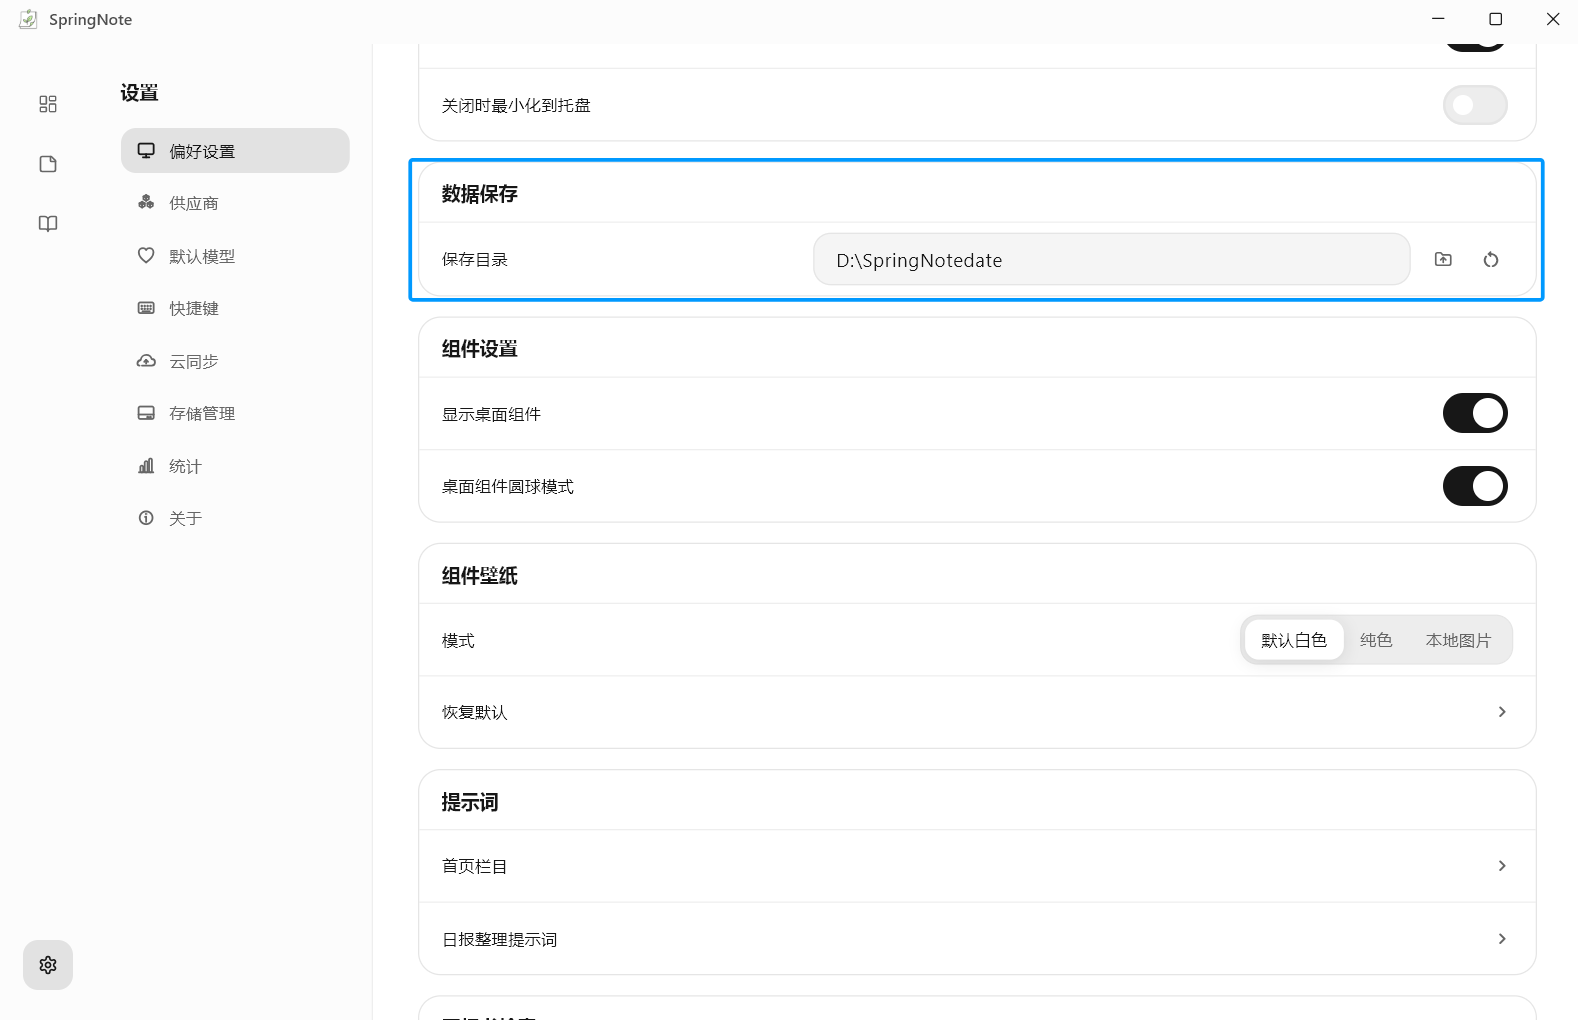
Step 1: Confirm Data Location
On first use, confirm the data directory. Daily notes, weekly notes, monthly notes, images, and related configuration are all stored around this directory; files selected via the home page are not copied into the data directory.
Step 2: Configure AI
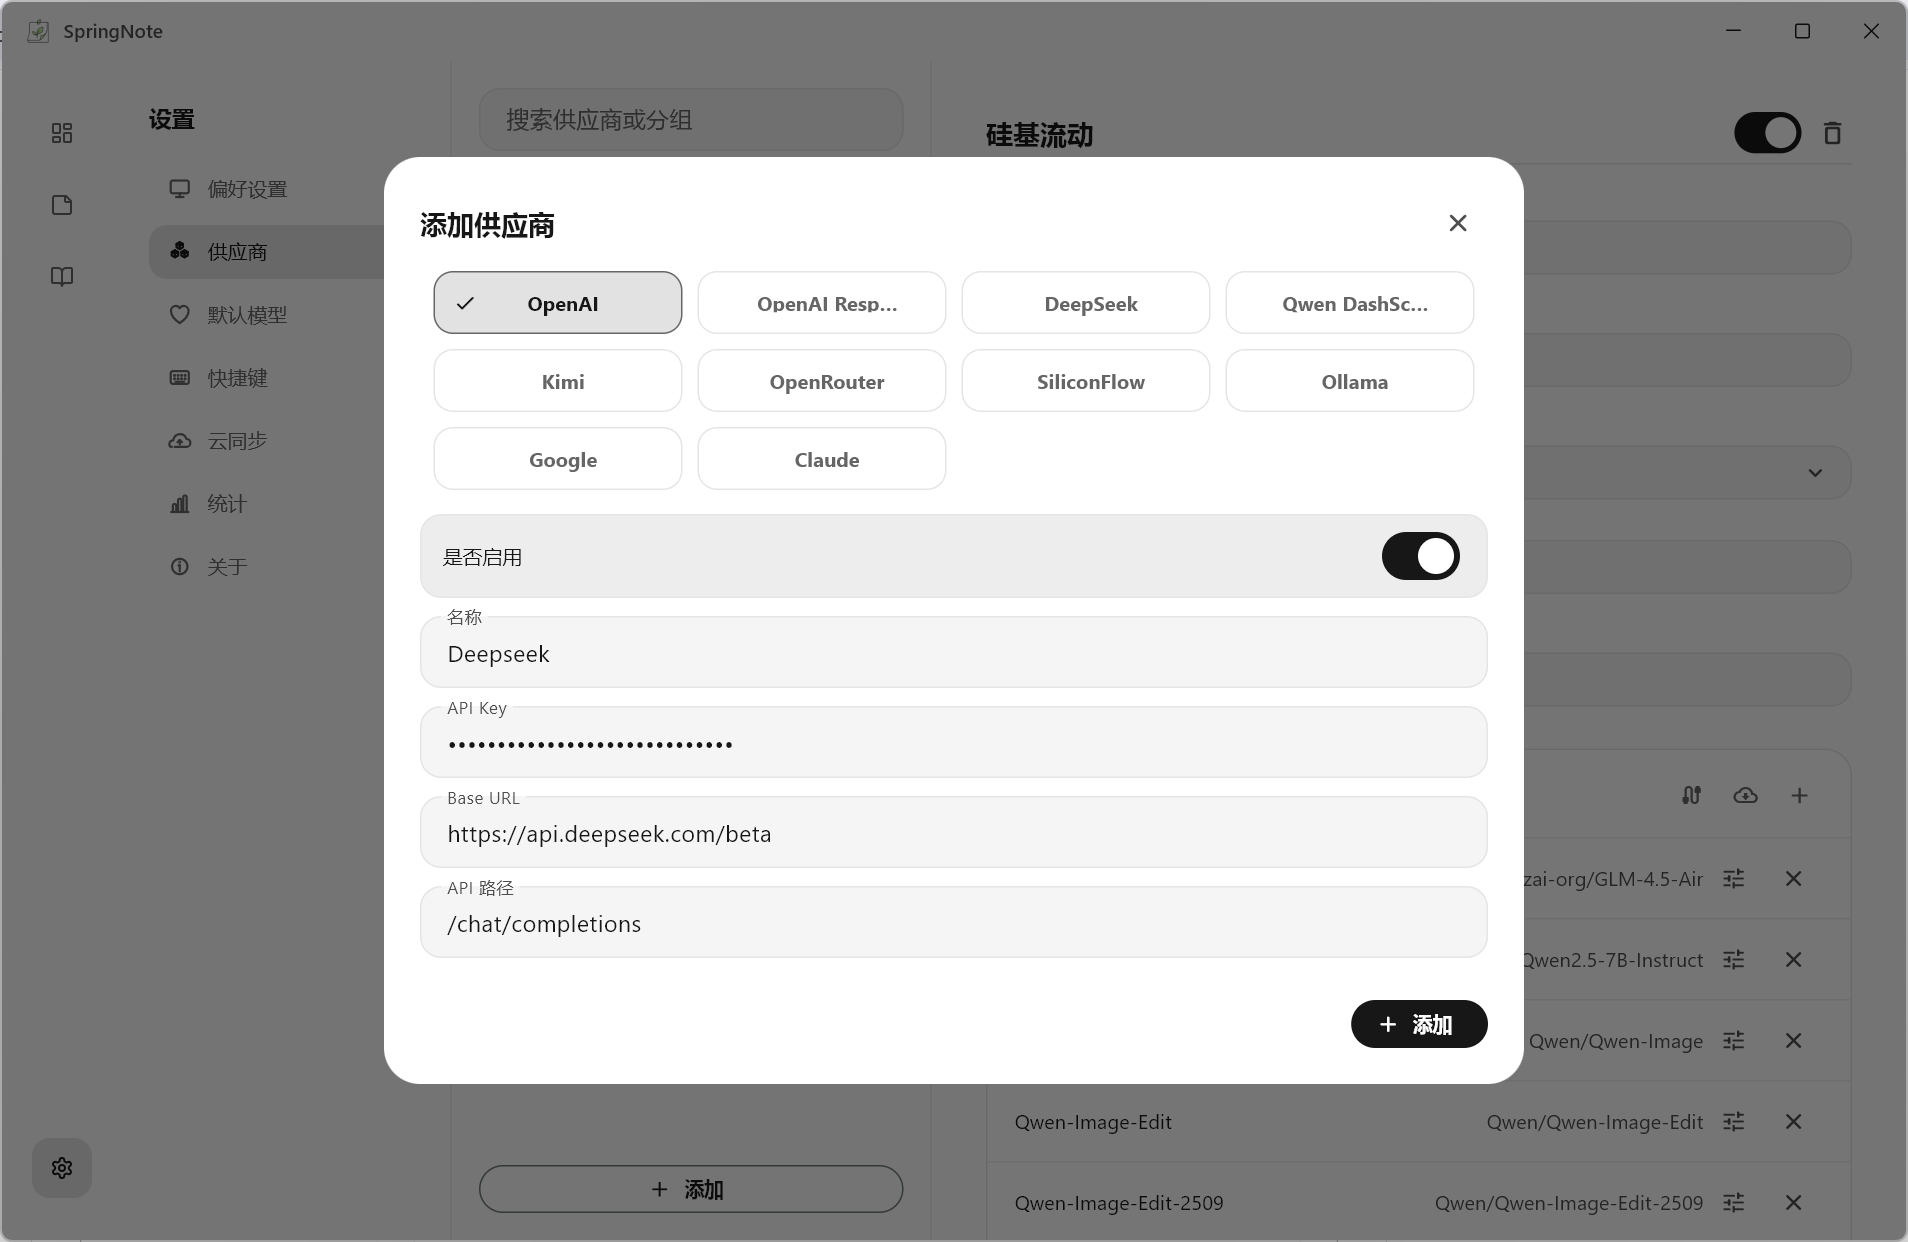
Using DeepSeek as an example:
1. Add Provider — Base URL: https://api.deepseek.com/beta
The
betaendpoint is required because DeepSeek's FIM API requires it.For other OpenAI-compatible providers, fill in the address according to their documentation.
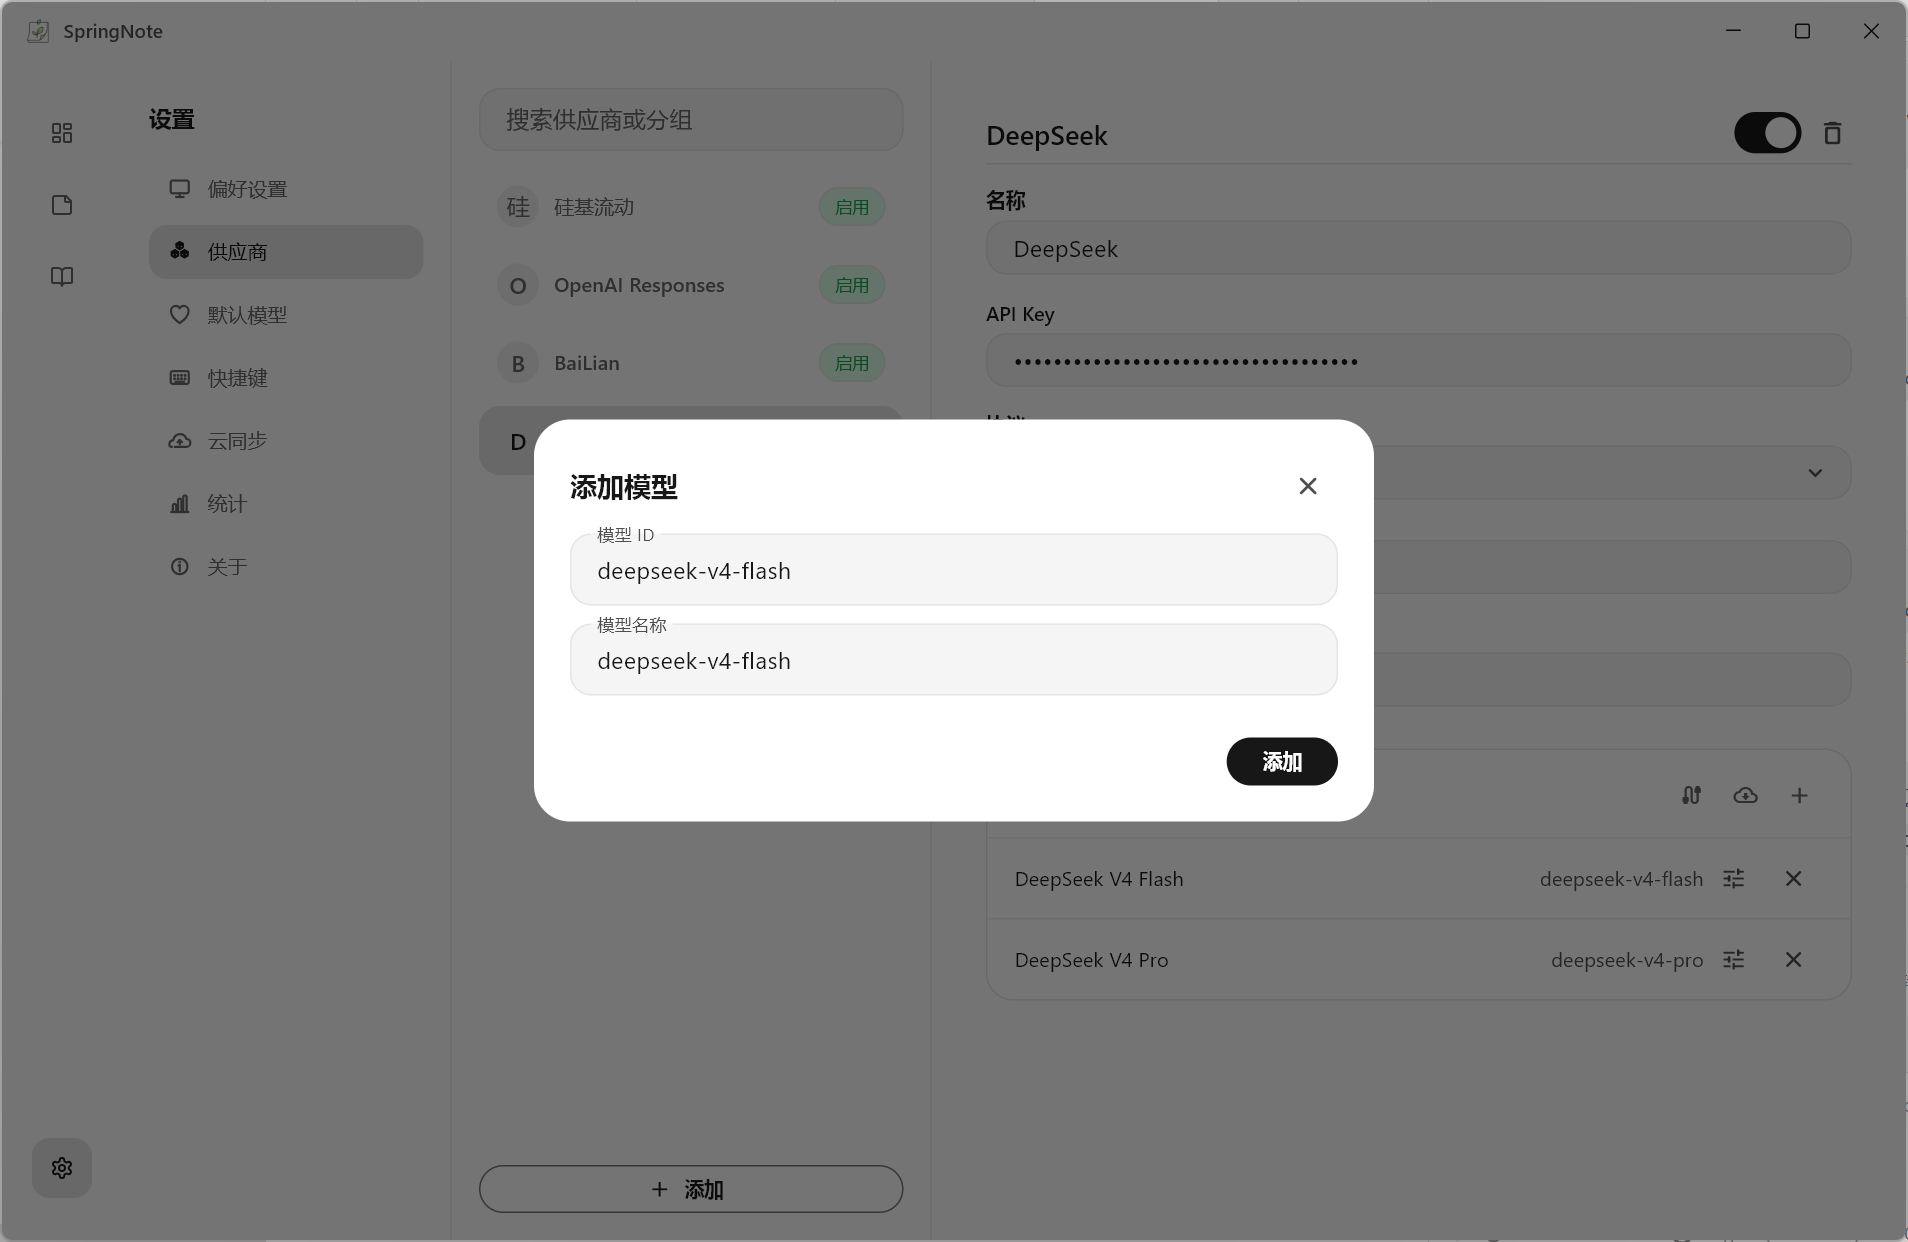
2. Manually Add Model deepseek-v4-flash
Since the DeepSeek
betaendpoint does not support model list queries, you need to add the model manually.
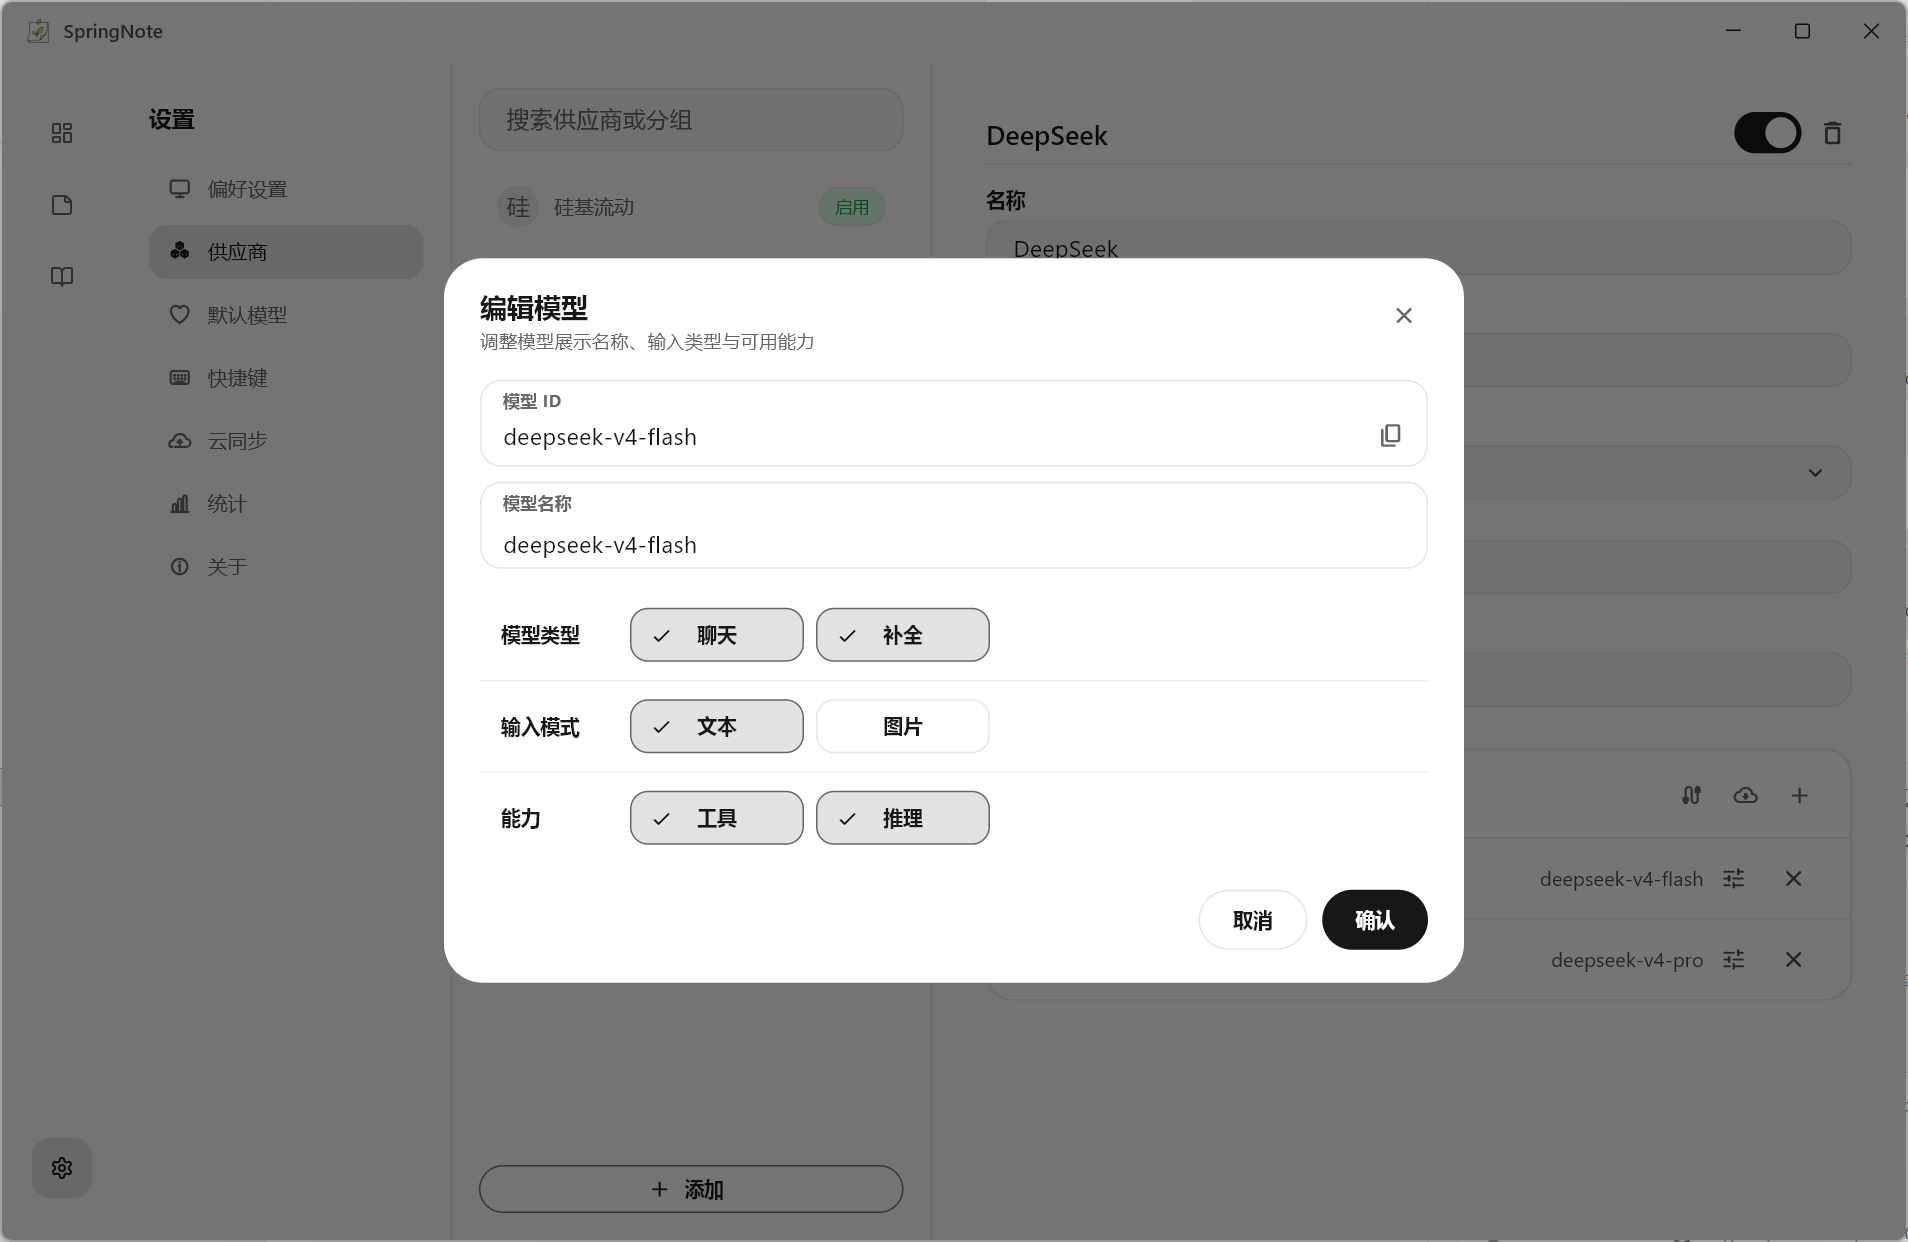
3. Edit Model
Manually check the completion type.
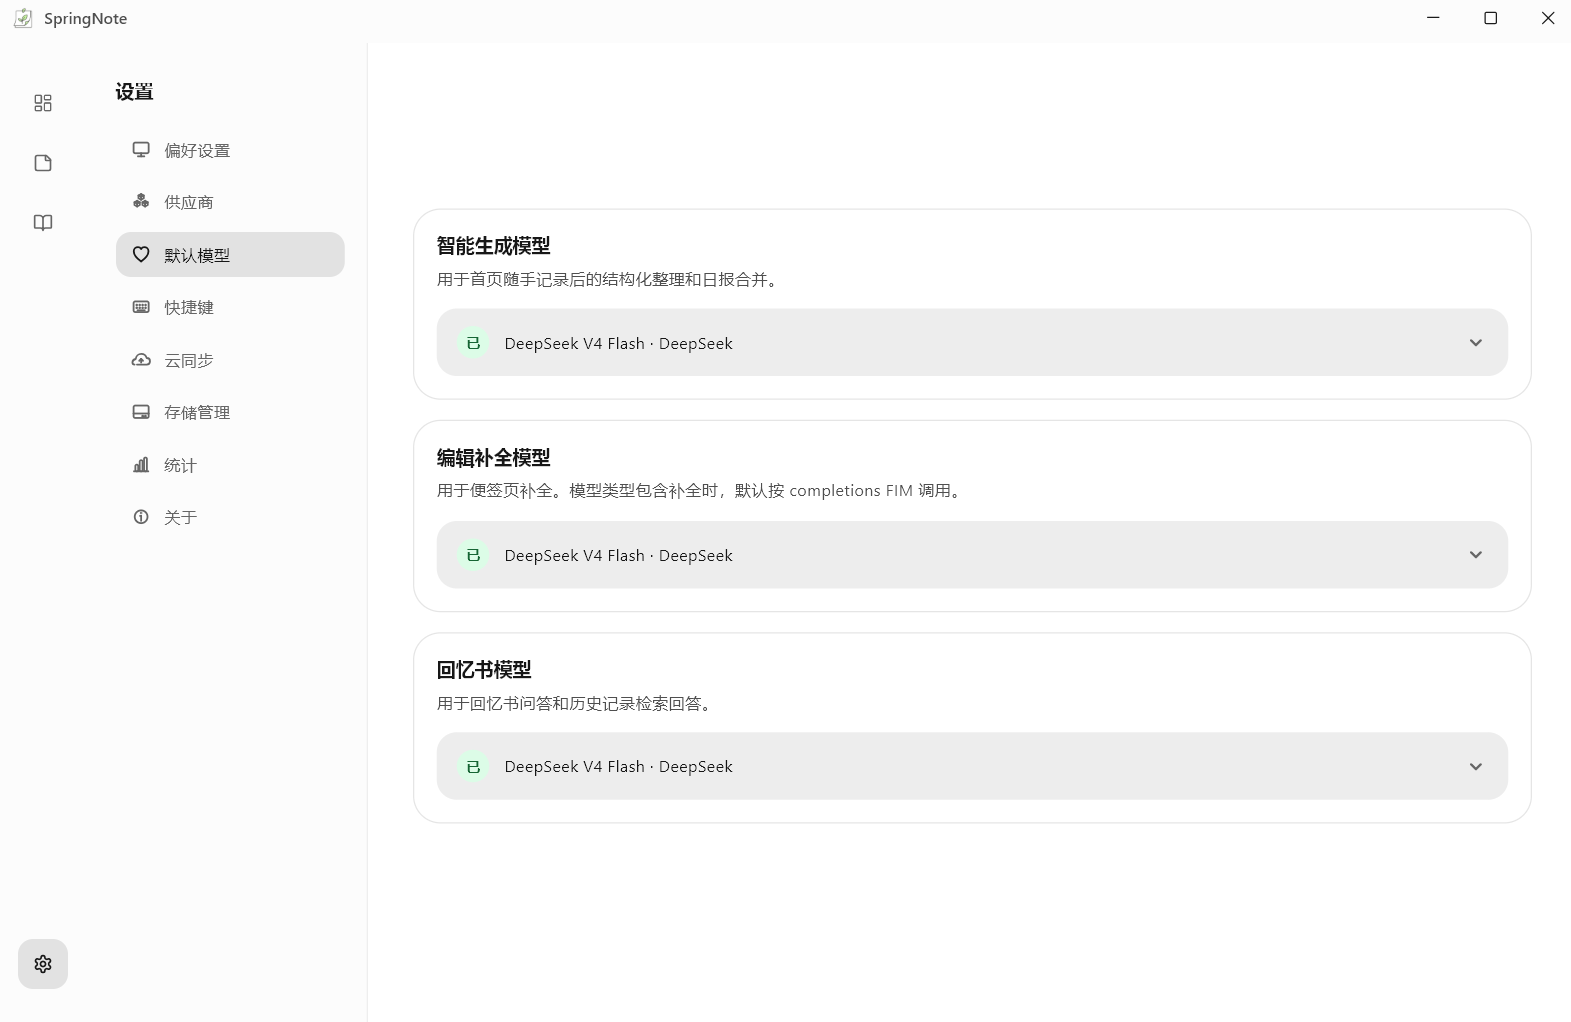
4. Choose Default Model
If your model does not support completion, it will not appear in the completion model selection list.
Step 3: Make Your First Entry
Enter Today's Content on the Home Page
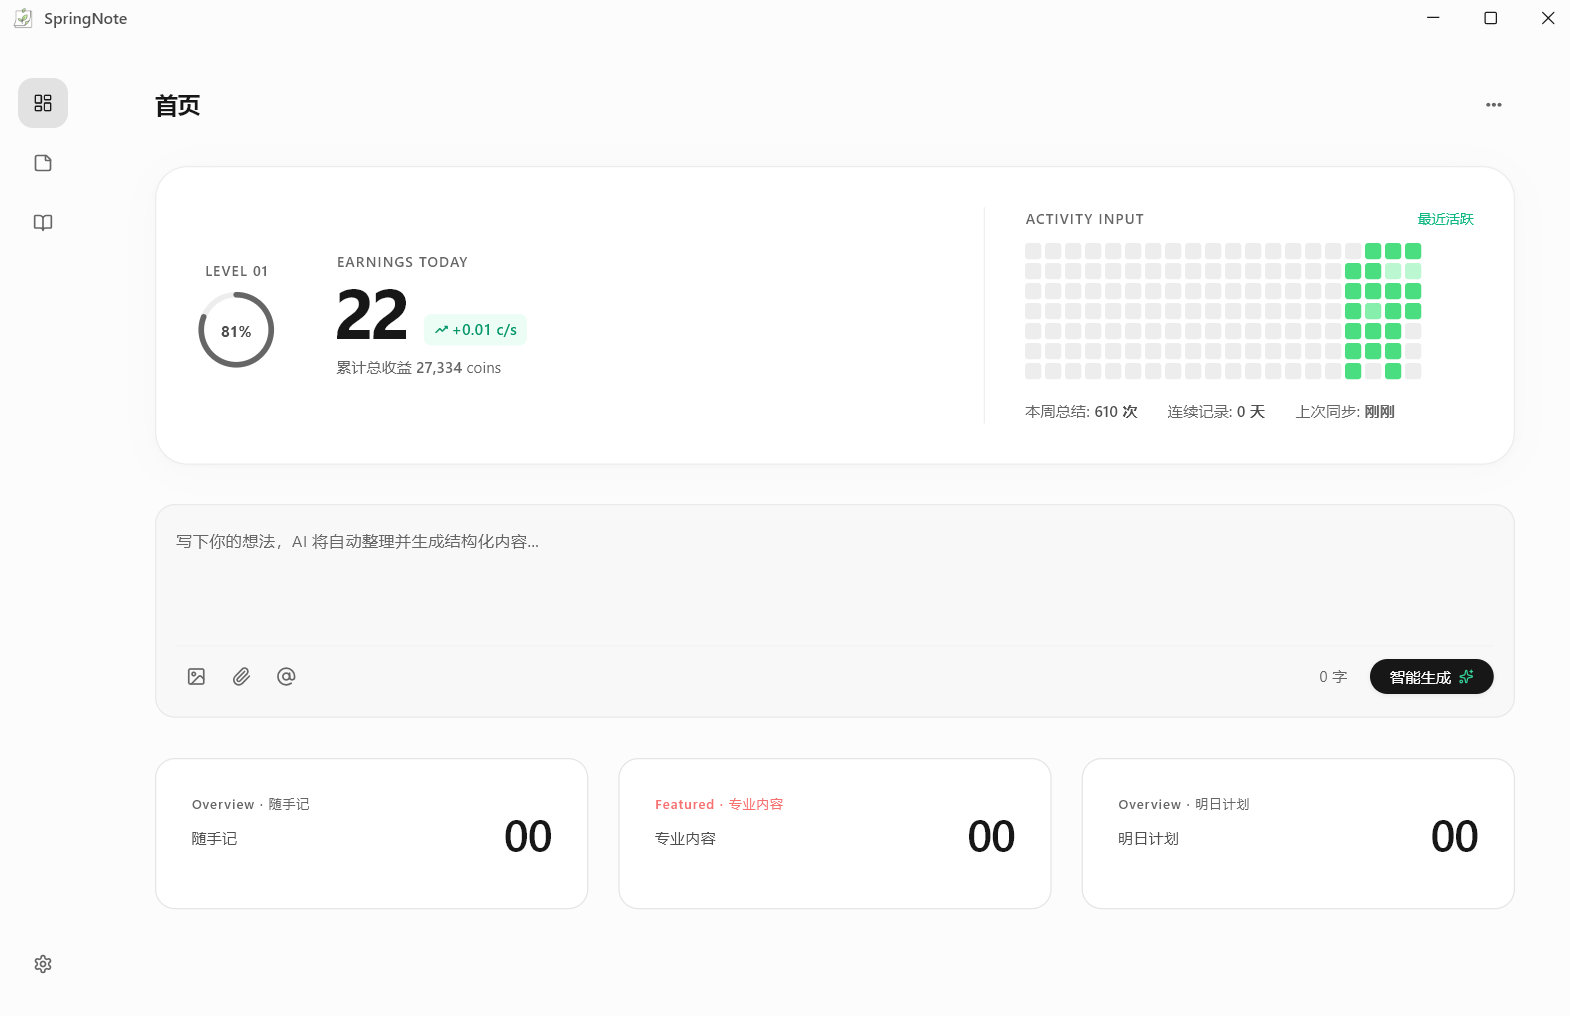
Open the home page and type your work log, thoughts, or to-dos into the quick input box. The text will be included in the day's daily note and organized into the three home columns.
Images can be added via the image button or pasted from the clipboard. After submission, images are saved to the data directory and a previewable Markdown image link is generated in the daily note.
The file button currently only includes the file name and path in the input. Files are not copied to the data directory, and the application does not read their contents; the path information does not mean the AI has parsed the file.
Run Smart Generation
After entering content, click "Smart Generate". If a smart generation model is configured, the application will organize the three home columns according to the prompt settings and attempt to merge new content into the day's daily note.
If no model is configured or the request fails, the text and saved images are still preserved, and the daily note uses a local merge result. Smart generation is not a prerequisite for saving regular entries.
The three home columns display the day's organized results. Click a column card to open a detail popup and view all entries in that column.
Step 4: View and Edit in the Notebook
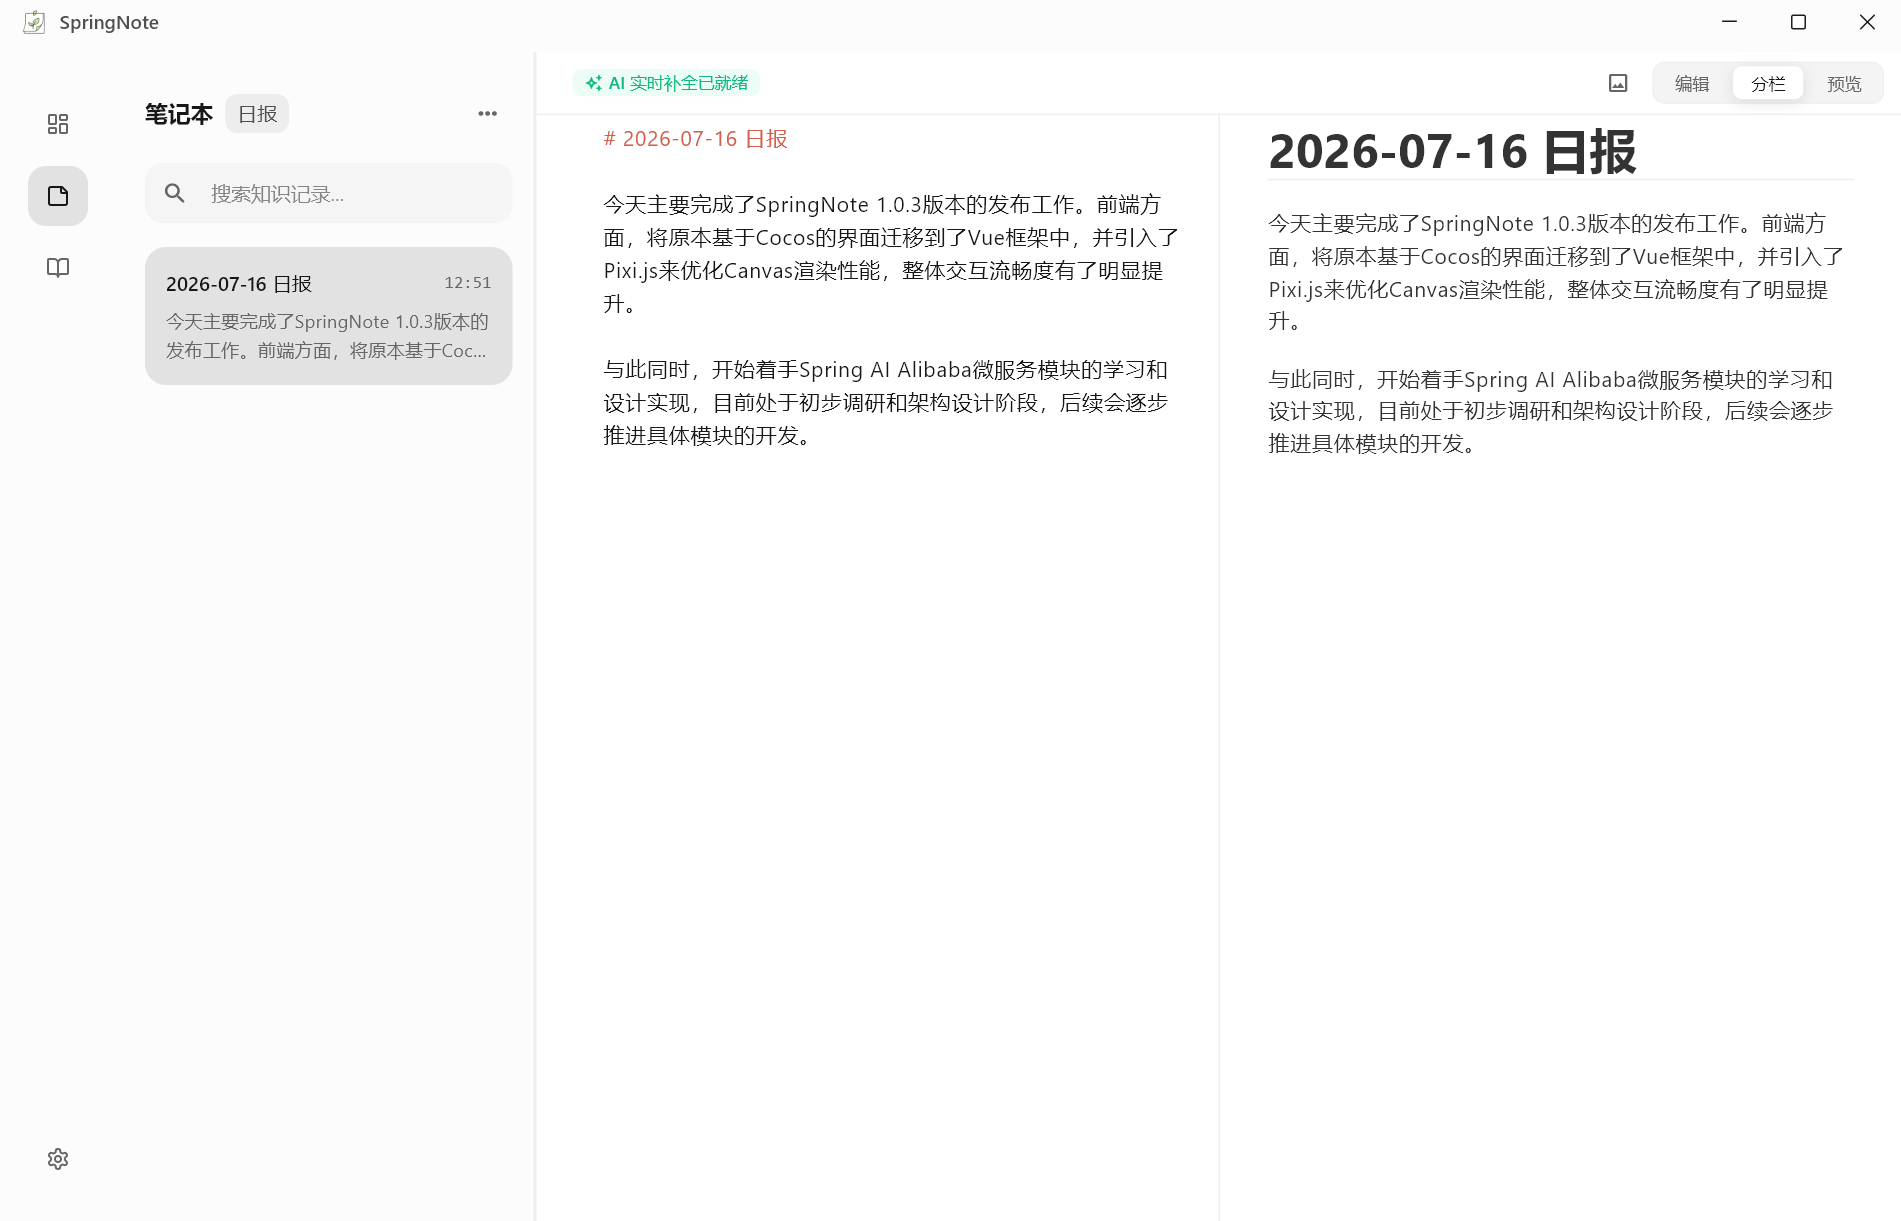
Open the Notebook to switch between Daily, Weekly, and Monthly notes. Daily notes are organized by calendar day, weekly notes by ISO week, and monthly notes by calendar month.
After selecting a note, the editor loads the raw Markdown. Edits are saved automatically, and the list title, preview, and search results update in sync. Use the top-right buttons to switch between "Edit", "Split", and "Preview" modes:
- Edit: Directly modify the Markdown source;
- Split: View the Markdown source and rendered result side by side;
- Preview: View only the rendered content.
Notebook search only searches within the currently selected note type (Daily, Weekly, or Monthly). Search requires at least two characters and returns all matching documents in that type; clicking a result opens the full note content.
Step 5: Use the Memory Book
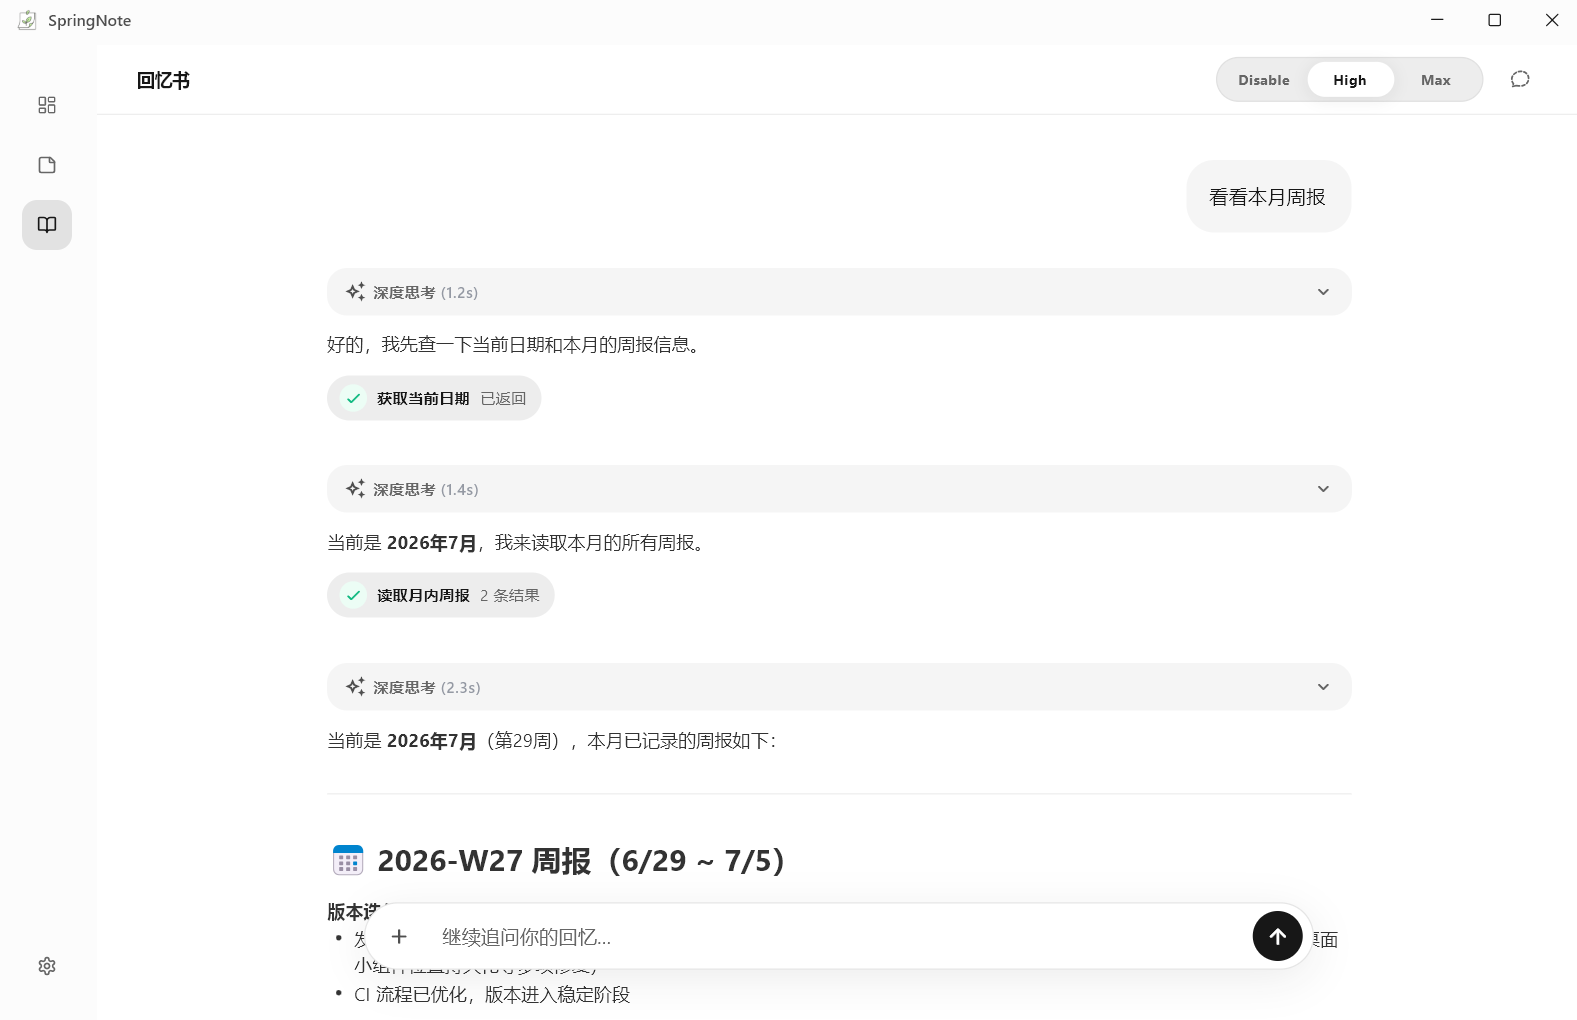
Open the Memory Book to ask questions about your saved work records. The Memory Book decides whether to perform keyword search, read daily notes by date, read weekly notes, or read monthly notes, then generates an answer based on the retrieved content.
When no Memory Book model is configured, keyword search and record reading still work, but no AI answer is generated. The Memory Book does not automatically modify daily, weekly, or monthly notes.
The thinking mode at the top of the Memory Book includes "Off", "High", and "Max". This setting only affects AI answer requests, not local search or record reading.
Click "New Conversation" in the top-right corner to clear the current Memory Book session and start from an empty context. This does not delete local notes, search indices, or Memory Book configuration; the application currently does not provide old session history recovery.
Step 6: Use the Desktop Widget

On Windows or macOS, SpringNote can display a standalone desktop widget. The widget shows the current timer, today's work duration and earnings, and controls the timer outside the main window.
- Left-click the widget: Start or pause the timer;
- Right-click the widget: Open the main window to the Home page;
- Left-click drag the widget: Move the window position;
- Hover over the widget in orb mode: Expand the widget;
- Move the mouse away from the orb area: Collapse the widget.
Widget position is saved after dragging; on multi-monitor setups it stays within the visible work area. Timer earnings are calculated from the daily work hours and daily wage in Settings; changing settings does not recalculate historical earnings.
Step 7: Configure Common Features
After getting started, continue configuring in Settings:
- Preferences: Personal info, font & display, behavior & startup, wallpaper, tray, data saving, prompts, and Memory Book retrieval;
- Providers: Add or disable AI services, test connections, and manage model lists;
- Default Models: Select models for Smart Generation, Edit Completion, and Memory Book respectively;
- Shortcuts: Record global and input shortcuts via actual key presses;
- Cloud Sync: Configure WebDAV connection and sync timing;
- Storage Management: Scan, preview, and clean up images no longer referenced by notes;
- Statistics: View heatmap, note counts, AI usage, work duration, and earnings.
Need Help?
Whether you encounter issues or have ideas and suggestions, we welcome your feedback.
We take every piece of feedback seriously and continuously improve SpringNote.
Join the SpringNote Official QQ Group to share experiences and ideas.
QQ Group: 463423961
When reporting issues, please include:
- Current version number
- Steps to reproduce
- Whether the issue is consistently reproducible
- Related screenshots or error messages
This information helps us quickly identify the problem.